- 31 . 01 . 11
ImageMagick and GraphicsMagick are fantastic tools for manipulating images. Here, I outline the montage sub-command and use it to tile two photos of differing dimensions, so that they can be easily aligned in a column format with other images.
- StumbleUpon
- TwitterTweet
- Facebook
You Need A Montage
Update: Check out an online montage creator that builds on this and adds a lot more! Montage Away!
My girlfriend Emily Benjamin is something of a special photographer and she is finally putting together a site to show off some of her great pieces. Naturally, I put her onto WordPress. Emily wants the photos to go front and centre, which is a fine idea, so we put together a very simple one-column theme based on QuickPic, which will be uncluttered and allow the photos to shine.
Problems arose when trying to lay out images though. Many of the photos are cropped for emphasis and impact, and being different dimensions, laying them all out on one page can look messy. This can be avoided by cheating a bit and pre-processing them in pairs and combining them into a single image, so that each constituent photos’ heights match. Arty people like because it allows for some cool dynamic looking layout. It also helps reduce the amount of HTTP requests which techy people care about.
How though to generate these tiled images? You could hand-crank one with GIMP, but that gets pretty boring after a couple of times. There are also a couple of commercial products out there that could help, but that seems like cheating. No, Team America said it best – you need a montage! ImageMagick’s montage command to be precise. (I happen to use GraphicsMagick, as ImageMagick was giving me insidious “Bus Errors” on my MacBook, but the same commands will work with both tools.) [Image|Graphics]Magick are some of the finest free tools available, and a shining example of the power of both open source communities and command line applications.
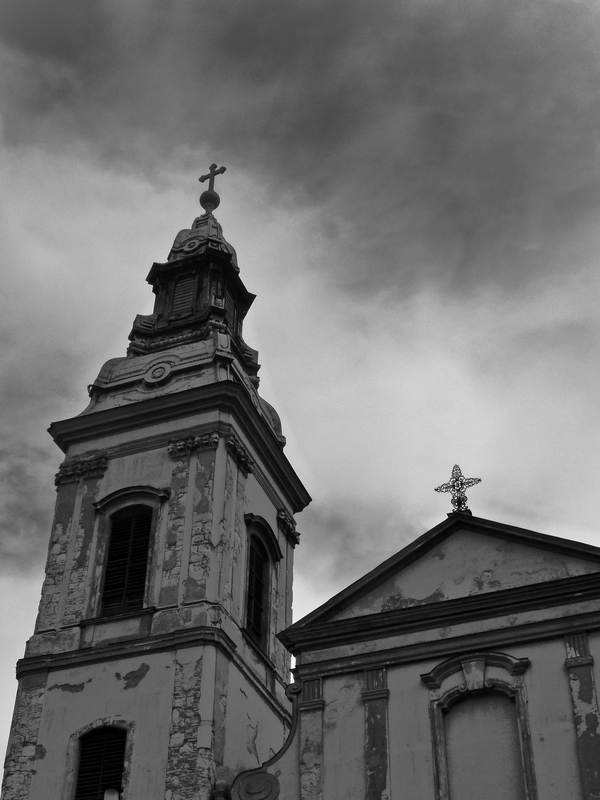
We start with two fine images, a church in Budapest and a view at sunset from the Ponte Vecchio, Florence. They’re both huge, because DSLRs now take photos at up to 20MB in JPEG format (!). So, we need to shrink them down a little bit and glue them together with a bit of whitespace, ensuring that the whole resulting image is 800 pixels wide (our chosen width for the main column).
The montage command makes this simple enough:
[bash]
gm montage -geometry x800+5 -background yellow lamppost.png bell.png -resize 800 output.png
[/bash]
You’ll notice that I’ve made the background yellow, just so we can see where the borders are here. The geometry parameter says to make sure each component image fits within 800px vertically, leaving a 5px border on each side. We decided that we wanted a 10px internal space between the photos, so 5px on the side of each photo works nicely. The -resize command at the end takes effect after the montage has been created and resizes the entire outputted image to 800px wide, preserving the aspect ratio. This is the size of photos that has been chosen for the host site, but on this site with a narrower main column I’ve forced it to 500px. You can click on the images to see them at full 800px size if you want to. I’ve chosen to output it as a PNG. The image looks like this:

That’s not a bad first go, but there’s plenty we can improve. The sunset photo is narrower than the church photo, so it has been centred within its cell. There’s also an extraneous border around the outside. We handle these with two additional parameters, gravity and trim. Gravity allows us to ‘pull’ each photo in a given direction within its cell, and trim gets rid of a border, whatever colour it is.
For the gravity, we want to pull the left photo rightwards, and the right photo leftwards, so the central spacing is consistent. We do that by specifying -gravity East for the first photo and -gravity West for the second.
[bash]
gm montage -geometry x800+5 -background yellow -gravity East lamppost.png -gravity West bell.png -resize 800 output.png
[/bash]

That’s looking better, but now we just have to get rid of that outer border. We do that using the -trim command, and at the same time I’m going to make the background colour transparent:
[bash]
gm montage -quality 100 -geometry x800+5 -background transparent -gravity East lamppost.png -gravity West bell.png -trim -resize 800 output.png
[/bash]
Notice that I do the trim before the final resize. ImageMagick commands are executed sequentially from left to right. I’ve also added a -quality parameter to keep the quality of the final image high. (In this case it’s probably too high, but we won’t worry about that.) Our image now looks like this:

and it’s looking pretty groovy. But what happens if we want to tile two photos of vastly differing heights? The ‘x800’ is a decent enough guess, but if we start off with source images that are smaller than that (but which would still comfortably make a nice component image in a larger montage), we can end up with a pretty crazy result:

Not awesome. The problem is that we are only guessing as to the height of the component images. We can do better than that though, using *Magick’s identify command. This tool gives everything you could possibly want to know about an image, but for now we’re only interested in the height, and that’s relatively straightforward:
[bash]
gm identify -format "%h"
[/bash]
which gives us a simple single number. Ideally, we only want to initially shrink the component images enough so that they are the same size vertically as the smallest vertical of the two. In practise, this means we are only shrinking the image that is larger vertically in the first stage. Once they are composed at the same height, we can glue them and shrink the resulting image. A little bit of bash scripting gets this done for us in a couple of lines:
[bash]
#!/bin/bash
HEIGHT_ONE=`gm identify -format %h $1`;
HEIGHT_TWO=`gm identify -format %h $2`;
if [ "$HEIGHT_ONE" -lt "$HEIGHT_TWO" ]
then
MIN_HEIGHT="$HEIGHT_ONE"
else
MIN_HEIGHT="$HEIGHT_TWO"
fi
gm montage -quality 100 -geometry x${MIN_HEIGHT}+5 -background transparent -tile 2×1 -gravity East $1 -gravity West $2 -trim -resize 800 output.png
[/bash]
(If you’re copying and pasting that, ensure you paste as backticks on lines 3 and 4, not quotes or apostrophes.)
Save that as ‘you-need-a-montage’, then make it executable and you can do:
[bash]
./you-need-a-montage left-image.jpg right-image.jpg
[/bash]
to end up with something like this:

Be sure to check out more of what ImageMagick and GraphicsMagick can do for you – this is just scratching the surface. And keep an eye out for Emily Benjamin too, once the site is up and running!
Leave a Reply